 Material Delivery
Road Mesh is manufactured from hexagonal woven wire with a transverse rod woven into the mesh at 160 mm intervals (Figure 1). Road Mesh is supplied in roll form from the production facility in lengths of 25 m and 50 m (Figure 2). The roll dimension varies depending on the width and length of the Road Mesh. The rolls are individually strapped at the factory for easy shipping and handling. Fasteners in the form of anchors or nails are supplied in boxes. Installation equipment in the form of power-actuated tools is not supplied by Zhengyang and is to be sourced from approved suppliers.
Foundation preparation
Road Mesh is placed on a prepared surface of existing concrete or asphalt, newly placed hot mastic asphalt (HMA) or one recently milled. Road Mesh is deployed so that the curvature of the mesh is in contact with the road surface.
Unrolling
To facilitate installation, the Road Mesh rolls are off-loaded at 25 m or 50 m intervals. Once the roadbed or base layer has been carefully prepared, the Road Mesh is unrolled so that the mesh rolls off over the top of the roll rather than the bottom of the roll. (Figure 3). This ensures that the Road Mesh is in contact with the road surface as much as possible. Following deployment, a rubber-tired roller is used to remove the inherent curvature of the mesh. A minimum of two passes (four runs) are required by the roller to ensure that the Road Mesh is
in intimate contact with the road surface. It is important that the roller moves up and down the placed Road Mesh in straight runs (Figure 4). Any turning that is required shall occur off the placed roll. Turning on the roll will distort the Road Mesh.
Fixing Procedure
A minimum of the first 4 m of each roll mesh shall be securely fastened to the existing surface with nail anchors placed every square meter by a power-actuated device.
Two types of anchors are available:
- Hilti HPS Screws
- Hilti Nails
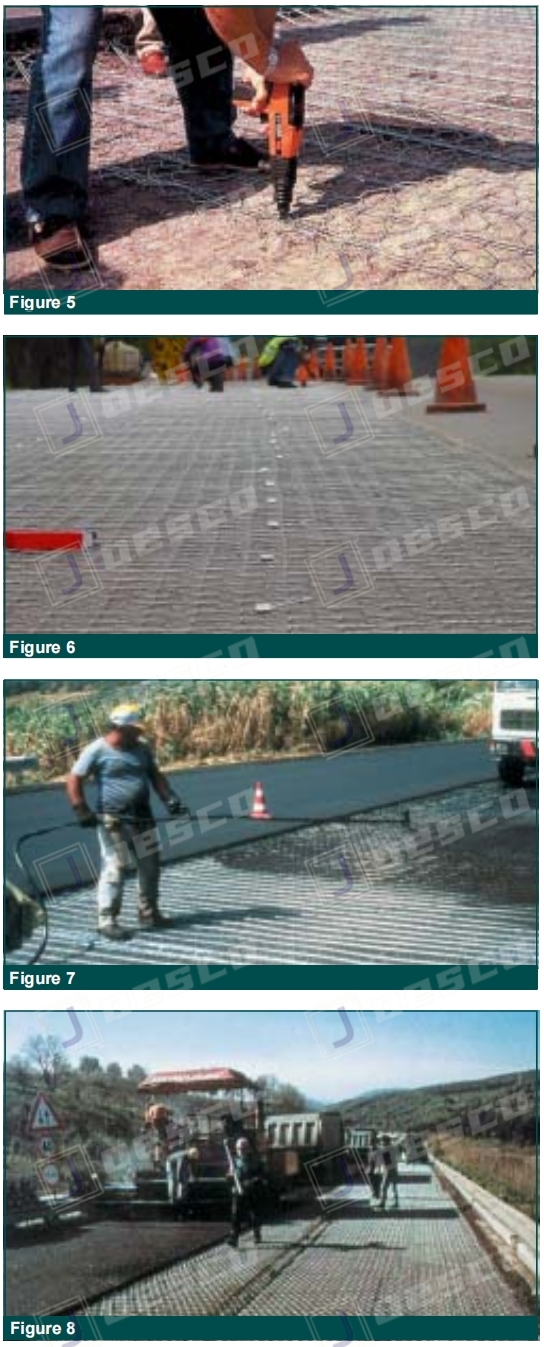
The type of anchor is chosen depending on the condition and type of the roadbed and base layer (Figures 5 & 6). Road Mesh placed on a granular base requires more of a screw-type anchor. When Road Mesh is placed on a much stiffer medium such as concrete, nail anchors would be more appropriate. The length of the anchor depends on the depth of the base layer and the pullout resistance generated. Anchors are supplied with clips that prevent the mesh from moving during the asphalting operation. For further advice in this regard, a nailing/anchor specialist should be consulted.
Overlapping
Overlaps of 300 mm transversely and 150 mm longitudinally are recommended as a minimum. When overlapping, it is necessary to shingle the panels to allow for easy placement of the asphalt. Only the end of the new roll should be fastened. Fixing of the overlap should be carried out as per the above procedure. When placing Road Mesh in thin overlays, special attention must be paid to the overlaps.
Construction
Depending on the condition and type of surface a tack coat or priming layer may be required (Figure 7)
This material may have several functions including sealing off various cracks that exist throughout the surface and providing an adhesive for the HMA to bond with the existing surface. When the mesh is placed within a stabilized layer at depth no pre-treatment is required.
When used within the bound HMA layers, Road Mesh is placed approximately 50 mm below the final surface. Depending on the function required, Road Mesh may be placed up to 300 mm below the final surface (Figure 8).
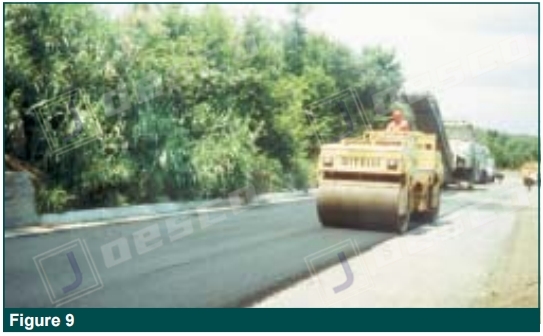
The remaining layers and the final HMA layer are rolled and compacted as per normal specifications (Figure 9).